In Seattle, the exterior painting season is notoriously short. Between the legendary "June Gloom" and the inevitable return of the rain in October, homeowners have a narrow window to properly protect their most valuable asset.
A successful exterior paint job in the Pacific Northwest isn't just about rolling on a beautiful color; it’s a battle against nine months of accumulated moisture, moss, and structural wear. If you skip the prep work, your expensive new paint will peel before Christmas. Here is the ultimate guide to prepping your Seattle home for a flawless summer paint job.
1. The "15% Moisture Rule"
The number one reason exterior paint fails in Seattle is that it was applied to wet wood. Even if the sun has been shining for two days, the deep fibers of your cedar siding or trim might still be holding winter moisture.
If you paint over wet wood, the paint creates a seal that traps the moisture inside. When the summer sun hits that siding, the trapped water vaporizes, expands, and blows the paint right off the house in massive bubbles.
The Solution: You must use a digital moisture meter before a single drop of primer is applied. The wood must register a moisture content of 15% or lower. If it's higher, you must wait for more dry, sunny days.
2. Defeating the Green Monster (Moss and Algae)
Homes heavily shaded by trees—common in neighborhoods like Lake Forest Park, Magnolia, and West Seattle—inevitably grow green algae and black mildew on the north-facing siding.
Many homeowners make the mistake of just power-washing the green stuff off. However, pressure alone doesn't kill the microscopic spores rooted in the wood. If you paint over live spores, the mildew will actually eat through your new paint from the inside out.
- Soft Washing: Apply a specialized fungicidal cleaner or a mild bleach solution to the affected siding. Let it sit for 15 minutes to kill the spores at the root.
- Rinse Gently: Use a low-pressure wash to rinse the dead organic matter away.
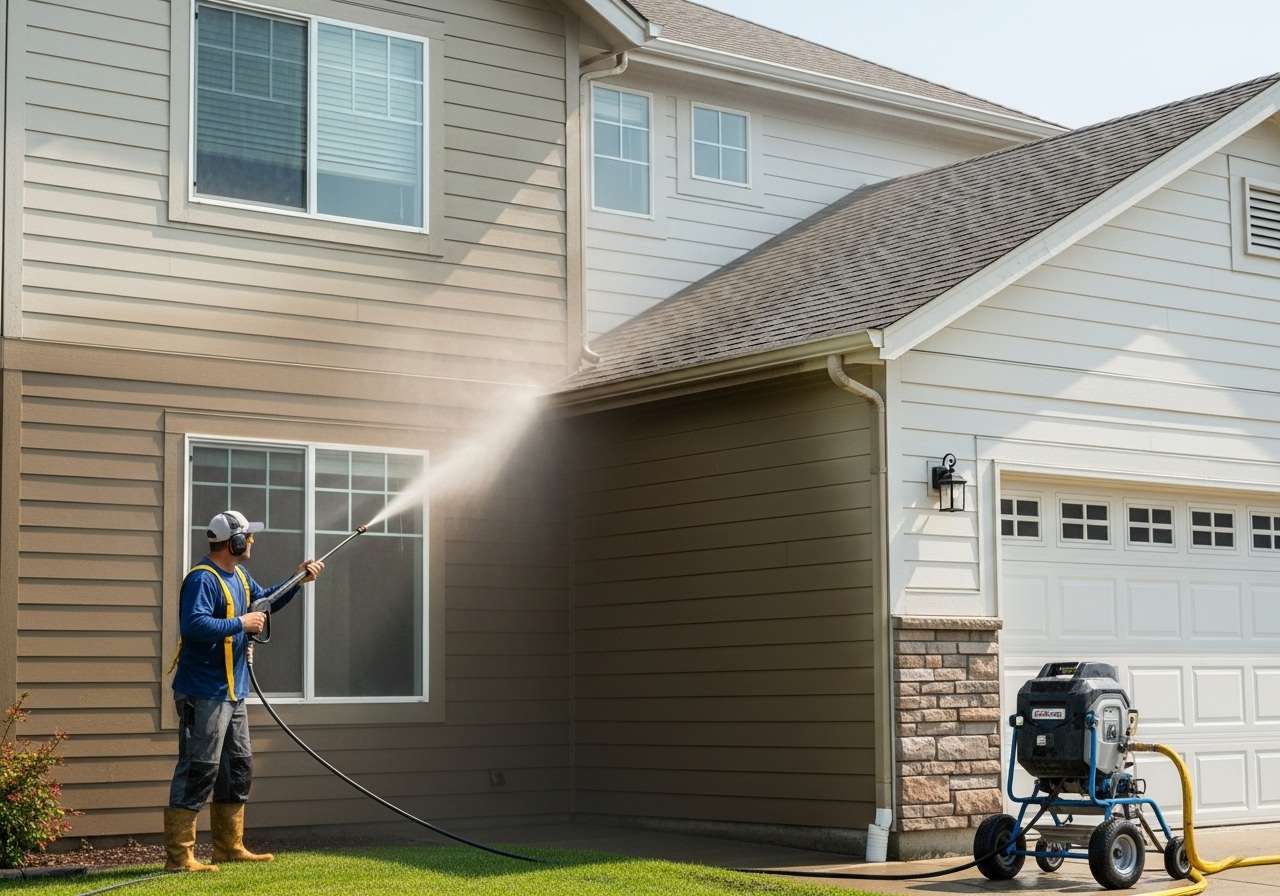
3. The Dangers of High-Pressure Washing
It is incredibly satisfying to blast dirt off a house with a 3000 PSI pressure washer. It is also incredibly destructive.
High pressure will inject water deep into the wall cavity behind the siding, and it will shred the soft fibers of cedar lap siding, leaving it fuzzy and splintered. A pressure washer should only be used to rinse off cleaning agents and remove loose, already-failing paint flakes. Never use it as a substitute for hand-scraping.
4. Scraping & Sanding (The Lead Paint Warning)
Once the house is washed and completely dry (remember the 15% rule!), all loose and peeling paint must be removed.
Crucial Seattle Note: If your home was built before 1978 (which applies to almost all homes in Wallingford, Queen Anne, Capitol Hill, and Ballard), it likely has lead-based paint on the exterior. Dry-scraping or power-sanding lead paint creates toxic dust that will contaminate your soil, posing a severe hazard to children and pets.
By law, contractors working on pre-1978 homes must be EPA RRP (Renovation, Repair, and Painting) Certified. We lay down heavy plastic sheeting to catch all chips and use wet-sanding techniques or HEPA-vacuum attachments to prevent dust from going airborne.
"Caulk is the cheapest insurance policy you can buy for your home. A $6 tube of high-quality caulk can prevent a $6,000 dry rot repair down the road."
5. Caulk is Cheap Insurance
Seattle's constant rain will find any gap in your home's armor. Once the scraping and sanding are done, you must meticulously inspect every joint where two pieces of wood meet.
- Where to caulk: Around all window frames, door frames, where siding meets corner boards, and any knot holes in the wood.
- Where NOT to caulk: Never caulk the horizontal laps (the bottom edge) of your lap siding. The siding must be allowed to breathe and drain moisture. If you seal the bottom edge, water gets trapped behind the boards and causes massive rot.
- The Right Material: Always use a high-stretch, exterior-grade elastomeric polyurethane caulk. Cheap acrylic caulk will crack as your house expands in the summer and contracts in the winter.
6. Spot Priming Bare Wood
Any area where you scraped down to bare wood must be primed before the topcoat is applied. For cedar (which contains natural tannins that will bleed through water-based paints and leave brown stains), you must use a high-quality, stain-blocking oil-based or synthetic shellac exterior primer.
Don't Miss the Weather Window!
Exterior painting requires precision timing and grueling prep work. Don't spend your entire summer on a ladder. Let the professionals at Couple Of Guys Painting handle the heavy lifting while you enjoy the sunshine.
Get Your Free Summer Estimate